
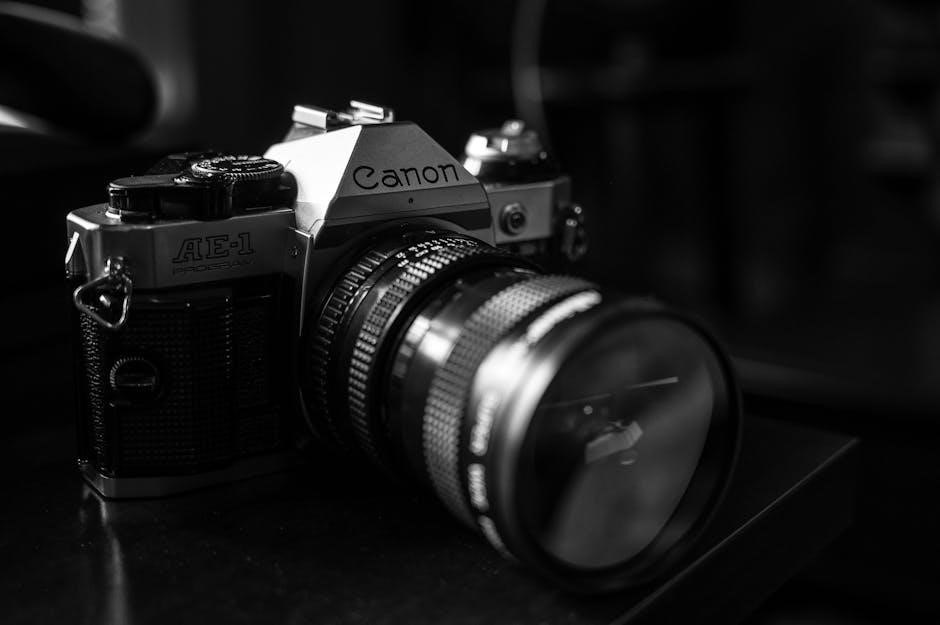
Canon FL lens service demands understanding their unique mechanics, differing from later FD designs; a 1972 manual provides crucial insights for repair endeavors.
These lenses, while logically constructed compared to some systems, present challenges requiring specialized knowledge and tools for effective maintenance and restoration.
Historical Context of Canon FL Lenses
Canon FL lenses, introduced in 1964, represent a pivotal step in Canon’s lens development, preceding the widely recognized FD mount. They were Canon’s first foray into interchangeable lenses with breech-lock focusing, a system that, while innovative, presented unique servicing requirements.
The FL mount aimed to improve upon the earlier R-mount, offering greater flexibility and optical quality. However, the mechanical complexity inherent in the breech-lock design necessitates a thorough understanding of disassembly and reassembly procedures, as detailed in the 1972 service manual.
Servicing these lenses today requires acknowledging their age and the potential for deteriorated lubricants and worn components. The manual serves as an invaluable resource for technicians seeking to restore these classic lenses to their original performance, bridging the gap between vintage technology and modern repair practices.
Scope of the Service Manual
The 1972 Canon FD Lens Service Manual, while titled for FD lenses, contains essential information applicable to the earlier FL series due to their mechanical similarities. It comprehensively covers the disassembly, inspection, cleaning, lubrication, and reassembly of Canon lenses from that era.
The manual details procedures for addressing common issues like aperture blade malfunctions, focusing ring stiffness, and optical element haze. It provides exploded diagrams and detailed instructions, crucial for navigating the intricate internal mechanisms of these lenses.
However, it’s important to note the manual’s age; modern lubricants and techniques may offer improvements. It serves as a foundational guide, requiring technicians to supplement it with experience and resourcefulness.

Tools and Equipment Required
Essential tools include screwdrivers, spanners, and specialized lens wrenches; the Canon FL service demands precision instruments for delicate disassembly and reassembly procedures.
Essential Tools for Disassembly
Disassembling Canon FL lenses necessitates a carefully curated toolkit. A set of high-quality, correctly sized screwdrivers – both flathead and Phillips – is paramount, as screws are often small and easily stripped. Japanese industrial screwdrivers are highly recommended for their precision.
Spanners, particularly those designed for lens work, are crucial for loosening retaining rings and adjusting mechanisms. Lens spanners prevent damage to delicate finishes. Rubber jar openers are invaluable for gripping rings without scratching.
Furthermore, a pin vise with a selection of small drill bits can aid in removing stubborn screws or pins. Soft-jawed pliers are essential for handling delicate components without causing damage. A cleaning station with appropriate solvents and brushes completes the basic toolkit.
Specialized Tools for Canon FL
Canon FL lenses often require tools beyond the standard repair kit. A rear element removal tool is frequently needed, as these elements are often secured with retaining rings. Specific spanners designed for the FL series’ aperture control mechanisms are also beneficial, ensuring proper fit and preventing damage.
Helicoid wrenches, used for adjusting focusing smoothness, are essential for addressing stiffness issues. A collet closer, used to securely hold the lens barrel during disassembly, is highly recommended. Furthermore, a feeler gauge set is useful for checking clearances and ensuring proper alignment during reassembly.
Finally, a good quality lens hook can assist in carefully lifting and positioning delicate lens elements during the process.
Safety Precautions During Service
Lens service demands meticulous care. Always work in a clean, well-lit environment to prevent dust contamination and lost parts. Wear appropriate eye protection to shield against flying debris or spring tension release. Avoid using excessive force during disassembly; components are often delicate and easily damaged.
When handling glass elements, use gloves or finger cots to prevent fingerprints and oils from affecting optical performance. Be mindful of small parts like springs and levers – document their placement before removal.
Proper grounding is crucial when working with electronic components. Finally, always discharge static electricity before handling sensitive parts to avoid potential damage.
Disassembly Procedures
Canon FL lens disassembly requires a systematic approach, starting with the focusing and aperture rings, then carefully removing the optical unit for servicing.
Focusing Ring Disassembly
Disassembling the Canon FL focusing ring typically begins with loosening set screws, often hidden beneath cosmetic bands or caps. Carefully note the position of all components – shims, levers, and the ring itself – as their correct placement is vital for smooth reassembly and accurate focusing.
The helicoid mechanism, crucial for focusing, may require gentle persuasion to separate. Avoid forceful separation, as damage to the delicate threads is common. Observe how the levers interact with the optical unit helicoid (OUH) during disassembly; this understanding will be invaluable during reassembly.
Pay close attention to any springs or detents associated with the focusing ring, as these control the focusing feel and range. Documenting each step with photographs is highly recommended to ensure a successful rebuild.
Aperture Control Disassembly
Disassembling the Canon FL aperture control is often more complex than the focusing ring, involving numerous levers, springs, and the aperture blade assembly. Begin by carefully releasing tension from the aperture lever; improper handling can lead to spring ejection and lost parts.
The aperture blade assembly itself requires meticulous attention. Note the orientation of each blade and its corresponding slot within the aperture mechanism. Removing the assembly often necessitates navigating around the optical unit helicoid (OUH), potentially requiring partial OUH disassembly.
Document the position of all levers and springs – their interaction is critical for proper aperture function. A clean, well-lit workspace is essential to prevent lost components during this intricate process.
Optical Unit Removal
Removing the optical unit from a Canon FL lens is a pivotal step, often blocked by the aperture control assembly. As noted, some designs necessitate partial disassembly of the aperture mechanism to free the optical unit helicoid (OUH). Proceed cautiously, supporting the lens during this process to prevent accidental drops.
Carefully unscrew the retaining rings securing the OUH. These rings can be tightly fitted and may require specialized tools to avoid damage. Once loosened, gently withdraw the optical unit, observing any shims or spacers present.
Document the position of all elements and spacers before complete removal. Handle lens elements only by their edges to prevent fingerprints or scratches.

Inspection and Cleaning
Thorough inspection reveals haze, fungus, or separation; cleaning lens elements and internal mechanisms is vital, using appropriate solvents and gentle techniques for clarity.
Lens Element Inspection
Careful examination of each lens element is paramount during Canon FL lens service. Begin with a visual check under bright, angled light, looking for scratches, chips, or any physical damage to the glass surfaces.
Next, inspect for internal haze or fungus growth, which can significantly degrade image quality. Utilize a strong light source and observe the elements from the rear, noting any cloudiness or web-like patterns.
Separation of cement between elements is a common issue in older lenses; look closely for bubbles or discoloration along the edges.
Document all findings meticulously, as this will inform the necessary cleaning or potential replacement of affected elements. A loupe or magnifying glass is essential for detailed inspection.
Internal Mechanism Cleaning
Thorough cleaning of the internal mechanisms is vital for smooth operation of Canon FL lenses. Begin by carefully removing dust and debris with a gentle air blower, avoiding any direct contact with delicate parts.
Use a soft brush to dislodge stubborn particles from grooves and threads. Isopropyl alcohol (99% purity) is effective for dissolving old lubricant and grime, but apply sparingly with a cotton swab, avoiding contact with lens coatings.
Pay close attention to the aperture blade assembly and focusing helicoids, ensuring they are free from obstruction.
Clean all levers and springs, as these contribute to the lens’s mechanical function. Always allow components to dry completely before reassembly.
Lubrication Points and Types
Proper lubrication is critical for the long-term functionality of Canon FL lenses. Key areas requiring attention include the focusing helicoids, aperture control mechanisms, and any moving levers or gears. Avoid over-lubrication, as this can attract dust and create further issues.
A light, high-quality camera grease is recommended for the helicoids, ensuring smooth and consistent focusing. For the aperture blades and control mechanisms, a specialized silicone-based lubricant is preferable, preventing stickiness and ensuring accurate operation.
Avoid using petroleum-based lubricants, as they can degrade rubber components. Apply lubricant sparingly with a fine brush or needle applicator.

Common Issues and Troubleshooting
Typical Canon FL lens problems include haze, fungus, aperture blade issues, and focusing ring stiffness; careful inspection and cleaning are essential for resolution.

Haze and Fungus Removal
Addressing haze and fungus within Canon FL lenses requires a methodical approach. Begin by carefully disassembling the optical unit, ensuring proper documentation of component placement. Gentle cleaning of lens elements is paramount; utilize specialized lens cleaning fluid and microfiber cloths, avoiding harsh chemicals that could damage coatings.
For stubborn fungus, a diluted isopropyl alcohol solution (typically 70% or less) can be cautiously applied, followed by thorough drying. Inspect the lens elements under bright light to confirm complete removal. Pay close attention to the internal surfaces of the lens barrel, as these areas are prone to fungal growth. Preventative measures, such as storing lenses in a dry, climate-controlled environment, are crucial for long-term preservation.
Aperture Blade Issues
Canon FL lens aperture issues often stem from dried-out lubricant or corrosion on the blade assembly. Disassembly requires careful navigation of the aperture control mechanism, noting the spring tensions and lever interactions. Inspect each blade for damage, bending, or oil contamination.
Cleaning involves gentle solvent application to remove old lubricant, followed by precise re-lubrication with a compatible grease – a critical step for smooth operation. If blades are bent, carefully reshape them using appropriate tools, avoiding excessive force. Ensure the aperture ring moves freely throughout its range after reassembly, verifying accurate f-stop settings. Addressing these issues restores proper exposure control.
Focusing Ring Stiffness
Canon FL lens focusing ring stiffness typically arises from hardened grease within the helicoid threads. Disassembly, as noted, can be complex, sometimes requiring partial aperture control disassembly for access. Carefully remove the old lubricant using a suitable solvent, ensuring no residue remains to impede smooth movement.
Re-lubrication is paramount; apply a high-quality, slow-drying grease specifically designed for lens mechanisms. Work the grease into the threads thoroughly, then repeatedly rotate the focusing ring to distribute it evenly. Check for smooth, consistent movement throughout the entire focus range. Addressing this restores precise focusing capabilities.
Reassembly Procedures
Careful reassembly, guided by the 1972 manual, is vital; ensure correct component alignment and gentle tightening to avoid damaging delicate lens mechanisms.

Optical Unit Reinstallation
Reinstalling the optical unit requires meticulous attention to detail, referencing the Canon FL lens service manual for precise positioning. Gently seat the unit within the helicoid, ensuring no binding occurs during rotation. Verify proper alignment of lens elements before securing the retaining rings – overtightening can distort the optical path, impacting image quality.
Pay close attention to any shims or spacers originally present, as these maintain correct element separation. A clean, lint-free environment is crucial to prevent dust contamination. After initial placement, slowly rotate the focusing mechanism through its full range to confirm smooth operation and absence of obstructions. The 1972 manual’s diagrams are invaluable during this stage, illustrating correct component relationships.
Aperture Control Reassembly
Reassembling the aperture control demands careful attention to the intricate arrangement of levers, springs, and the aperture blade assembly. The Canon FL service manual’s exploded views are essential for correct component placement. Ensure each spring is seated properly, providing consistent blade movement throughout the aperture range.
Inspect the aperture blades for damage or bending, replacing as needed. Lubricate pivot points sparingly with a suitable grease, avoiding excessive application that could attract dust. Verify smooth, even aperture closure and opening, free from sticking or hesitation. Proper reassembly is vital for accurate exposure control and sharp images.
Focusing Ring Reassembly
Reassembling the focusing ring requires precise alignment of the helicoid threads. The Canon FL service manual details the correct order of components – rings, gears, and retaining screws. Apply a specialized grease to the helicoid threads to ensure smooth, consistent focusing action. Avoid over-tightening screws, which can bind the mechanism.
Check for any play or looseness in the ring’s movement. Ensure the infinity and minimum focus points are accurately positioned. A properly reassembled focusing ring should rotate smoothly and predictably, allowing for precise image sharpness. Careful attention to detail is crucial for optimal performance.

Adjustment and Calibration
Post-service calibration is vital; the 1972 manual guides focus and aperture accuracy adjustments, ensuring optimal image quality and precise operation of the lens.
Focus Calibration Techniques
Achieving accurate focus with Canon FL lenses necessitates a methodical approach, often relying on a focus screen and distant object observation. The 1972 service manual details procedures for adjusting the focusing ring, utilizing shims and precise screw adjustments within the helicoid assembly.
Technicians typically focus on an infinitely distant target, then carefully disassemble the focusing mechanism to fine-tune the position of internal elements. This involves loosening set screws and gently shifting components until perfect focus is achieved.
Proper calibration demands a stable setup and a keen eye, as even minor adjustments can significantly impact image sharpness. The manual emphasizes the importance of avoiding excessive force during adjustment to prevent damage to the delicate internal components.
Aperture Accuracy Adjustment
Ensuring correct aperture operation is vital for proper exposure and image quality in Canon FL lenses. The 1972 service manual outlines procedures for calibrating the aperture blades, utilizing a light source and precise screw adjustments within the aperture control assembly.
Technicians verify aperture openings against marked values, adjusting screws to ensure each f-stop corresponds to the correct blade position. This often involves disassembling the aperture mechanism to access the adjustment points.
Care must be taken to avoid damaging the delicate aperture blades or linkages during adjustment. The manual stresses the importance of smooth, controlled movements and avoiding over-tightening of screws, maintaining consistent and accurate aperture control.

Resources and Further Information
Essential resources include the 1972 Canon FD Lens Service Manual and online repair communities, offering valuable insights and support for Canon FL lens restoration.
Canon FD Lens Service Manual (1972) Details
The 1972 Canon FD Lens Service Manual, though titled for FD lenses, is a foundational document for servicing the earlier Canon FL series as well. It details the mechanical construction, disassembly, and reassembly procedures applicable to many FL lenses.
This manual, available through resources like Learn Camera Repair, provides schematics, parts lists, and detailed instructions crucial for diagnosing and resolving common issues; While focusing on the FD mount, the core principles and techniques for addressing aperture problems, focusing ring stiffness, and optical unit servicing are directly transferable to FL lenses.
Understanding the manual’s diagrams and terminology is essential for anyone undertaking FL lens repair. It’s a primary source for understanding the intricacies of these classic lenses and performing accurate, effective maintenance.
Online Repair Communities and Forums
Successfully servicing Canon FL lenses often benefits from collaborative knowledge sharing found within online repair communities and dedicated forums. These platforms provide a space to ask questions, share experiences, and access specialized expertise not always found in manuals.
Experienced technicians and enthusiasts frequently discuss specific FL lens issues, offering solutions for common problems like haze, fungus, and aperture blade malfunctions. Accessing these discussions can significantly streamline the repair process and prevent costly mistakes.
These communities are invaluable resources for locating hard-to-find parts, interpreting complex schematics, and staying updated on best practices for vintage lens restoration.